import pandas
pandas.__version__1 Getting Up and Running
1.1 Motivation
Data has become interwined with the inner workings of nearly every facet of working within the BC Public Service. Whether you have to read an excel spreadsheet, prepare a report based on a survey, comb through csv files to find a specific data source, it is likely that you have worked with a dataset at some point in your career. However, the process of looking at and dealing with data can be messy, error-prone and hard to duplicate. Questions such as ‘wait, how did I get that number again?’ are all too common.

The Messy Side of Data
These lessons will teach you how to interact with data in a systematic way using the python ecosystem. By accessing and interpreting data through a set of prescribed methods (developed through the code written), our work with data becomes more accessible, repeatable, and ultimately insightful.
During the course of these lessons, we hope to cover:
- Python preliminaries
- Exploring and cleaning raw data
- Using statistical methods
- Plotting results graphically
If we have time, we may touch on some more advanced python lessons, such as:
- Publishing reports
- Accessing the B.C. Data Catalogue
- Machine learning in python
1.2 BEFORE STARTING!!
So that we can hit the ground running with this workshop, we are asking that everyone get some basic python tools downloaded and installed before the workshop starts. Tools that we will use include Anaconda (or Miniconda) as well as VSCode. A basic knowledge of the command line/powershell interface will be useful as well, but we will try to keep our use of this to a minimum.
Important
If you are having issues installing anything we have requested prior to the start of the workshop, please let us know so we can work with you so that we can hit the ground running!
- Anaconda/Miniconda is used to download, install, and organize both python and any packages/libraries we use within python. The actual program doing the organizing is
conda, while we will use ananaconda prompt(not theanaconda powershell prompt!) to do the installs and interface with python. - VSCode is a tool used to write, edit and test code known as an IDE (Integrated Development Environment). It is available for more languages than just python, and its versatility has made it a widespread tool within the BCPS.
Install our Python Tools
If you do not have administrative rights on your computer:
Download Anaconda and VSCode from the B.C. Government Software Centre:
- Install Anaconda (Anaconda3X64 2022.05 Gen P0)
- Install VSCode (VSCodeX64 1.55.2 Gen P0)
If you do have administrative rights on your computer:
- If you have administrative rights on your computer, we suggest downloading the lightweight version of Anaconda called Miniconda.
- Find the latest version of VSCode here.
Install some Python Packages
Most of the time, when using python we are not using it by itself, but in conjunction with powerful libraries that have already been built to make our data analysis easier. In order to use these tools, we have to install them as well. Using a package manager such as conda makes our life much easier, as we can safely install tools into local environments where every library installed is checked for compatability with every other library. By utilizing the local conda environments, we maintain clean working spaces that can be easily reproduced between workstations.
Let’s run through the basic steps of setting up a conda environment, installing python and some packages, and testing that it worked!
TipPrompt not Powershell!
In order to get anaconda to play nicely with VS Code later, it is important that we do the following set of steps inside an Anconda Prompt and not the Anaconda Powershell Prompt! These are similar but not identical environments.
- Open an
anaconda promptfrom your search bar.

Anaconda Prompt
- Make sure that we have an appropriate version of
condainstalled. If this is already the installed version, great! If not, press Enter or type Y and hit Enter when asked to proceed (which will apply throughout all of these steps).
Anaconda Prompt
> conda install conda=4.12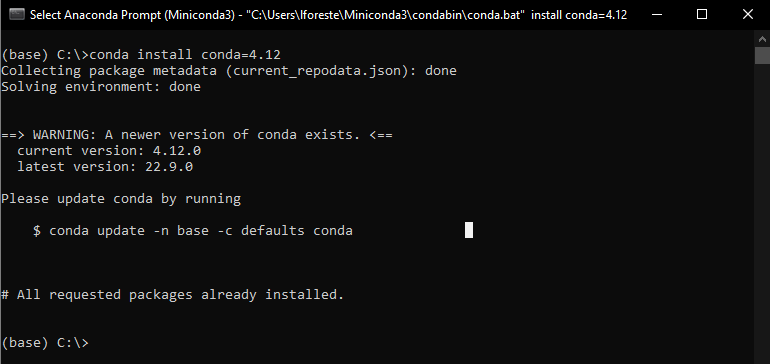
Setting the Conda Version
ImportantPlease update conda?
The command prompt might give instructions to update conda to a newer version at this point. Ignore this: as of right now the most recent version has an issue that is not worth working around!
- To make conda play nicely with VSCode later on, type the following command in the prompt window as well:
Anaconda Prompt
> conda init- Inside the
anaconda prompt, create a new local conda environment namedds-envusing the following commands:
Anaconda Prompt
> conda create --name ds-env
> conda activate ds-env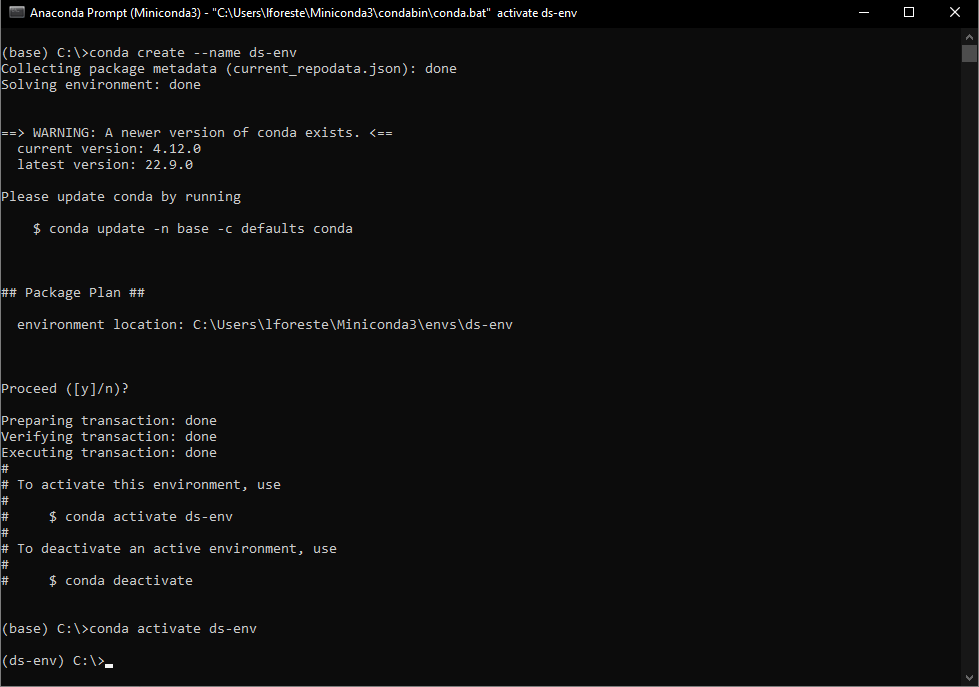
Creating a Conda Environment
You should notice that running this second command switches the name in brackets at the beginning of your prompt from (base) to (ds-env). This means we have successfully created a new, empty environment to work in.
- Install
pythonand some useful datascience packages by typing the following commands into the same prompt window:
Anaconda Prompt
> conda install python=3.9
> conda install notebook jupyterlab ipywidgets matplotlib seaborn numpy scikit-learn pandas openpyxl- Make sure that
pythoninstalled successfully. From the sameanaconda prompt, simply typepython. If this causes no error, success! Try typing this command in the python environment that started to make sure the packages installed as well:

Testing the python installation
If this all works with no errors, python was successfully installed.
Setup our VSCode Environment
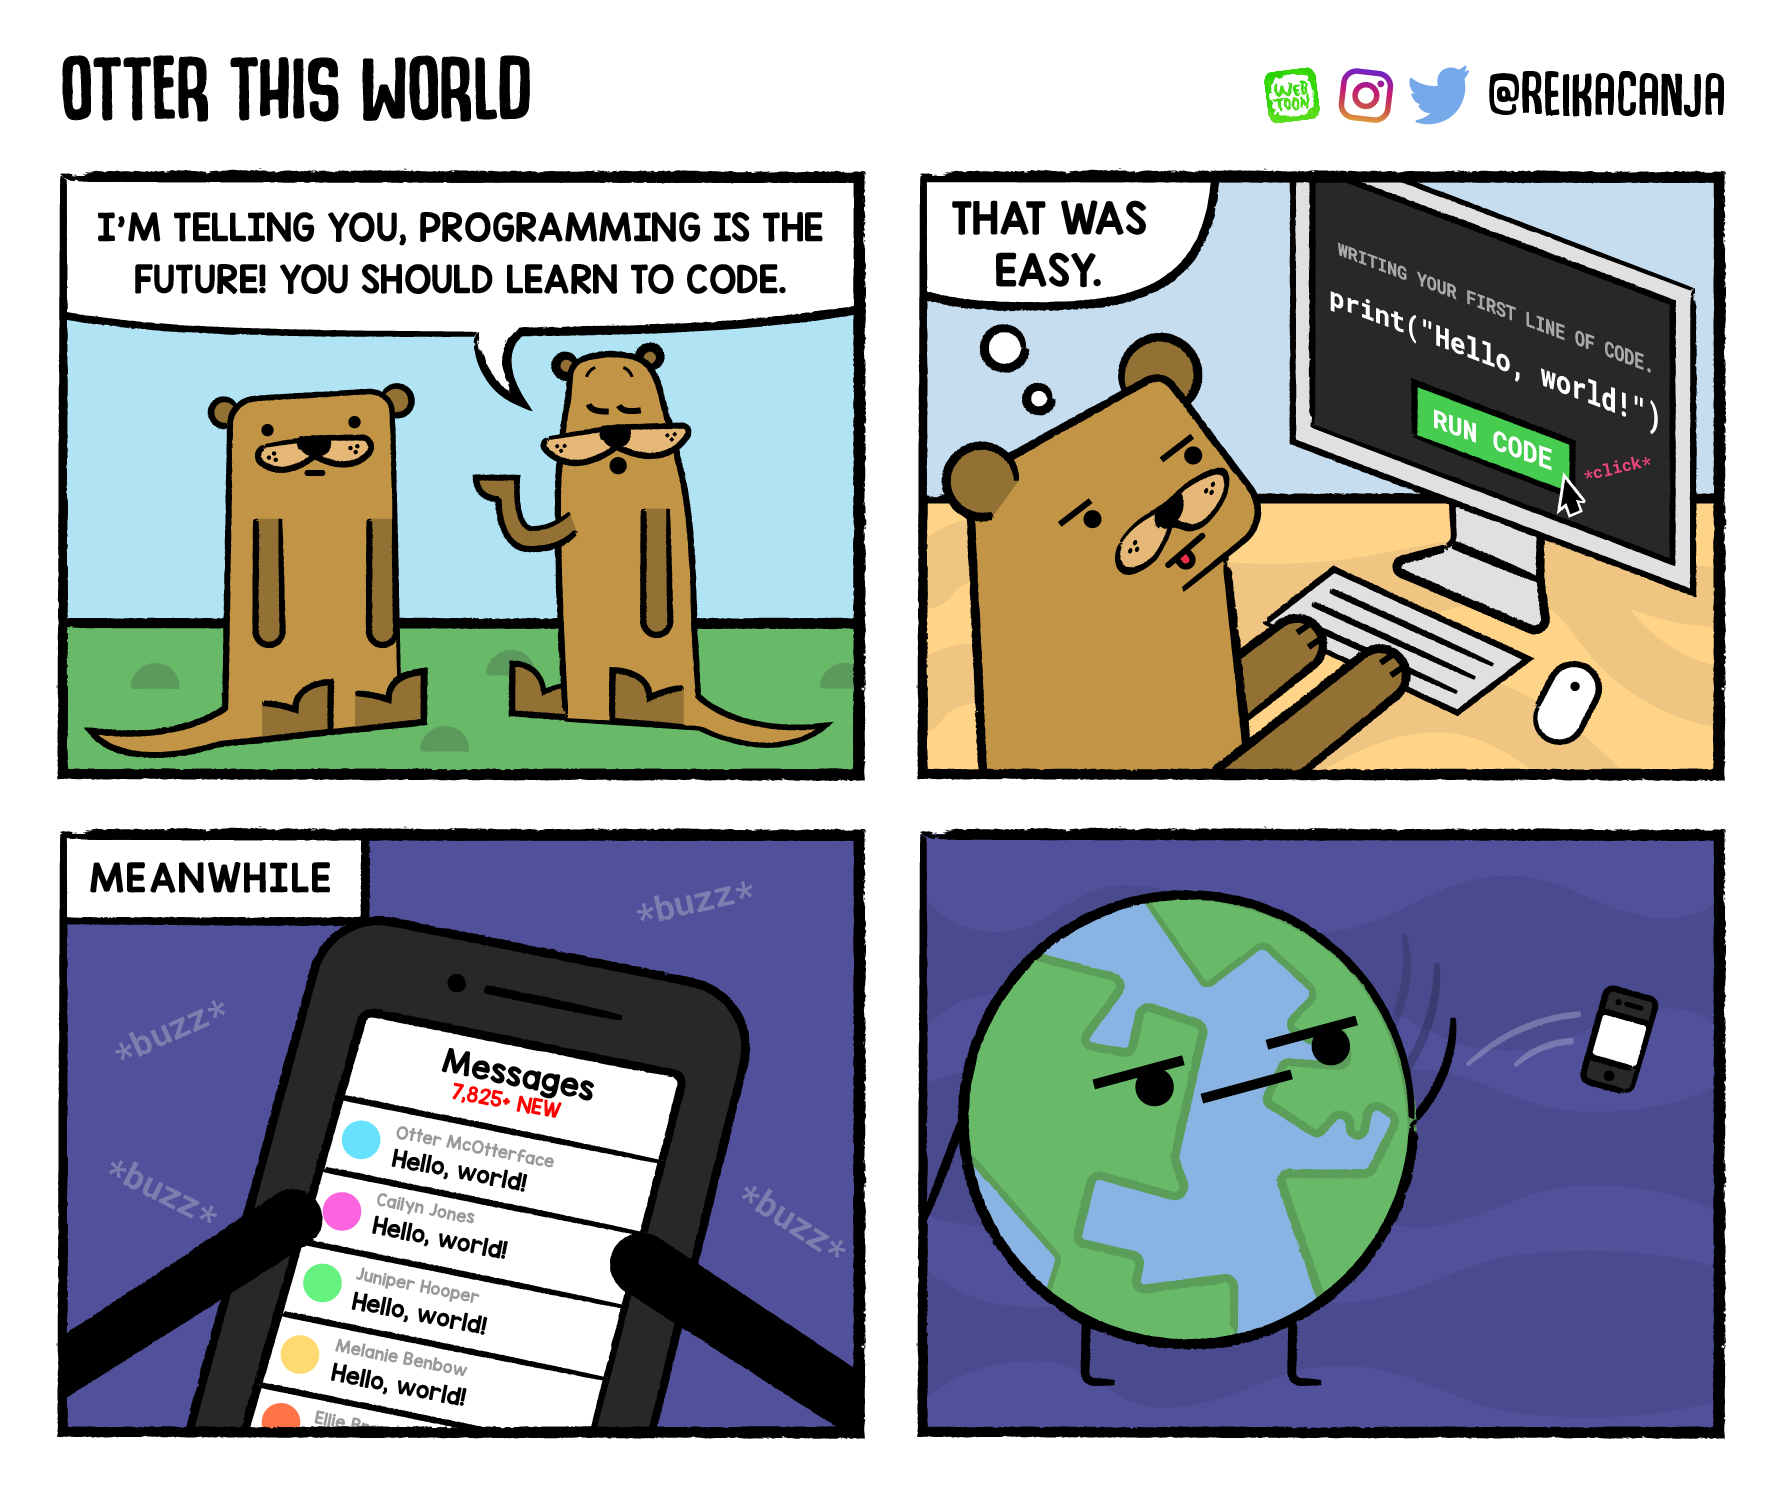
Still with me? Great. Here’s a cute otter as congratulations for making it this far.

The cutest.
We have just a few more steps to go.
- Open the VSCode program.
- On the left toolbar, find the
extensionstab (It looks like 4 squares). Search for thepythonextension and install this extension. - For those using Windows computers, change your default terminal to the
command prompt:- From anywhere inside VSCode, hit Ctrl + Shift + P. This will open up the command palette.
- Start typing
Terminal: Select Default Profileuntil this option pops up. - Choose this option, and then click on
Command Prompt
That’s it. We are ready to go!
1.3 Hello World
i.e. the how many different ways can we print Hello World! to our screen? section
Hello World!
There are many different ways in which we can interact with python. These include:
- From the command line
- Inside a Jupyter Notebook
- From a file (inside VSCode)
In this next section, we are going to have a brief introduction to all of these methods of interaction.
TipTip: Using the command line
It’s worth pointing out that the methods that we will focus on in this course will rely on using VSCode or JupyterLab and all of its inner workings. However, if you are comfortable with the command line, we can also access any of these methods directly from there as well, you just need to be able to move to directories before typing commands. If you use the command line, I recommend using an anaconda powershell prompt, as this allows for the easiest use and access to conda commands and only the smallest of headaches.
Step 0
In all cases, we will want to have a folder from which we wish to work out of. Take some time to set up a folder somewhere you won’t lose it. For me, I’ve simply made a folder called intro_to_python on my C: drive that will hold any course materials we use/create here.
Next, to make any interactions with python, we will want to open VSCode and work from here. When we first open VSCode, you should be prompted to open a folder. We are going to work out of that intro_to_python folder, so open it here. After doing this, we should now have a VSCode screen open that will look something like this:
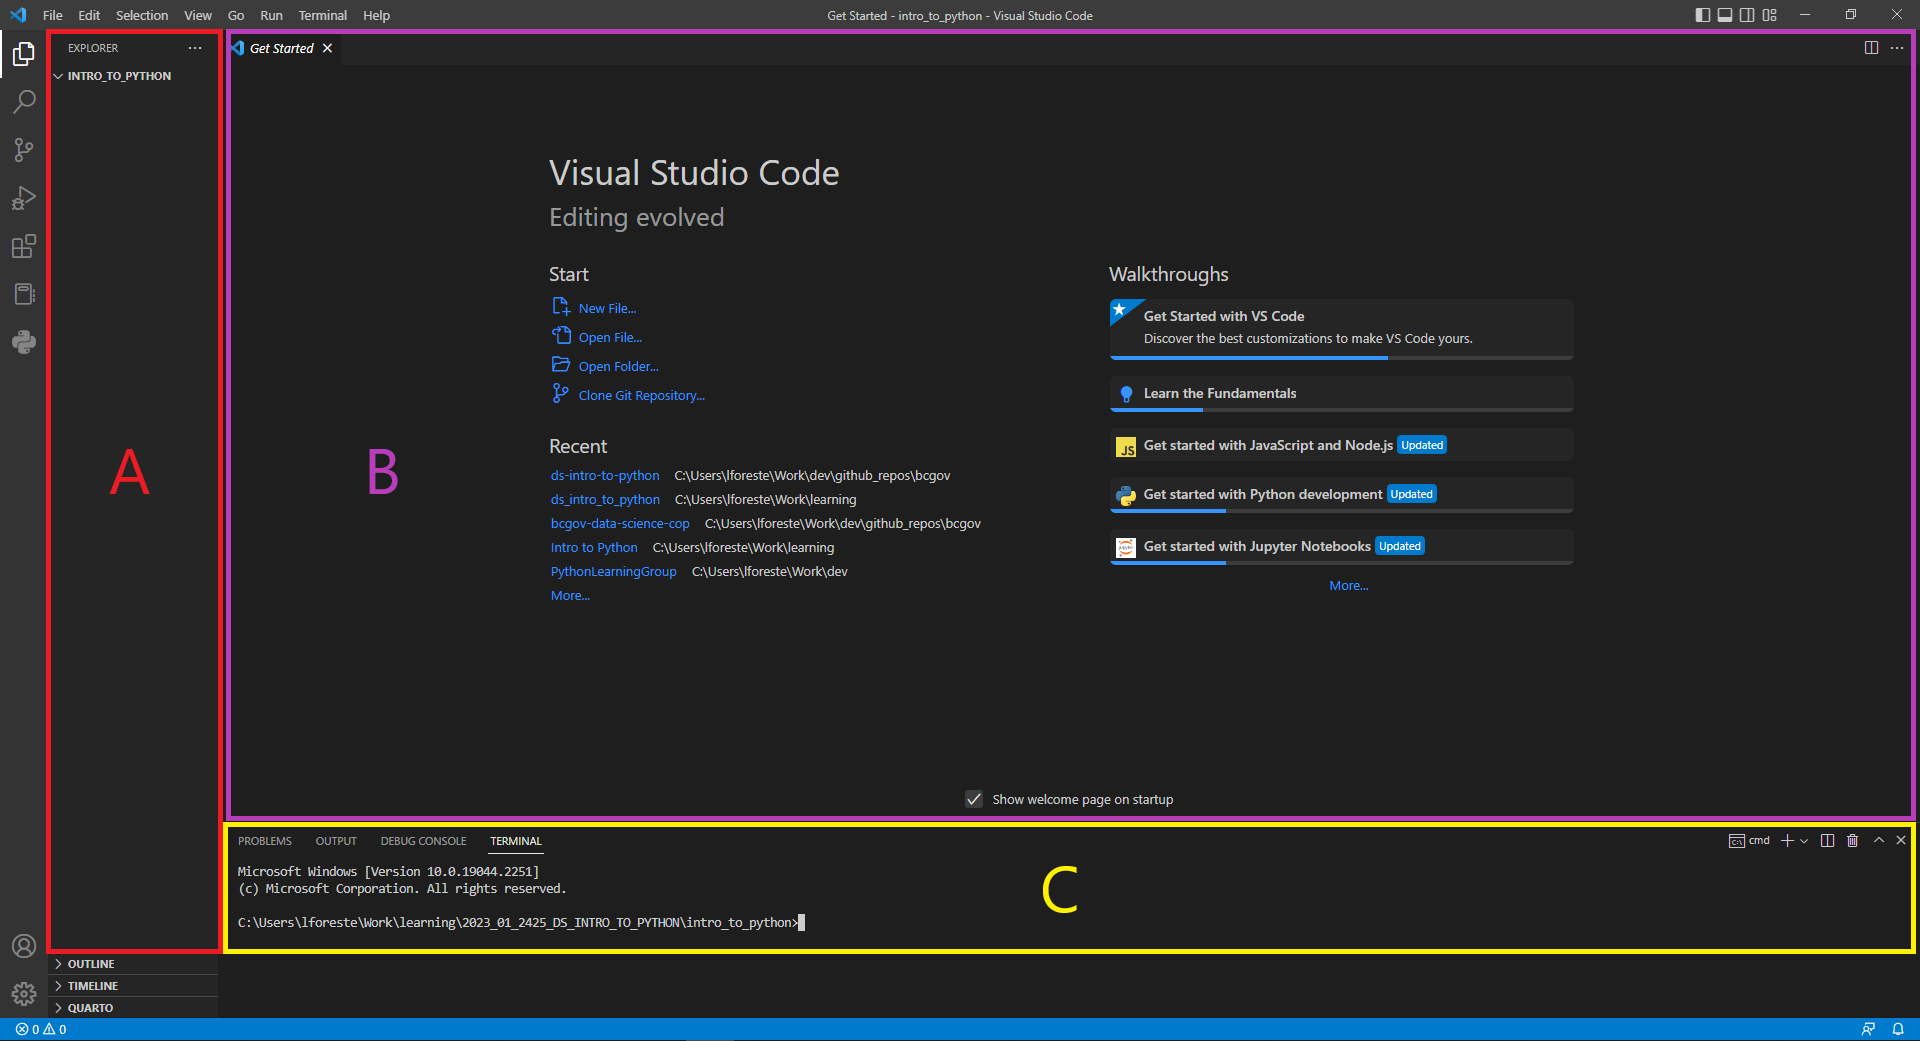
VS Code
We have 3 main areas that we can utilize:
- To the left (area A): is the current folder and subfolder directory list. We can make new files directly from here.
- To the right (area B): this is where files we are working on will live. For some file types, preview windows will be available as well.
- To the bottom (area C): this is where we can open and run commands from the command line (or terminal).
Now remember, we set up a special environment that contains python and our data science packages. We want to make sure we are always using this environment, so in the open terminal, re-type conda activate ds-env and this terminal will now be open in this environment. We also want to check that VSCode itself (and not just the terminal) will use the same environment. We again access the command palette with Ctrl + Shift + P, and begin typing Python: Select Interpreter. Click on this, and choose the ds-env option. We are good to go!
TipConda Environments
Although it does add an extra level of set-up whenever we start a python project, having these conda environments ends up being incredibly important for not only reproducibility, but making sure that packages work well together. When in doubt as to if you are using the correct environment, double check that the terminal you are using has (ds-env) in brackets at the start of a line.
From the command line/terminal
Let’s start with an easy one. To start a python session from a terminal, simply type python at the command line, and the terminal will automatically open a python interface. You will know you are inside the python interface if your command lines now start with >>>. Now, let’s do the classic Hello World command for python:
print('Hello World!')Hello World!To exit the python interface and return to the regular terminal, you can type exit() and return to the terminal.
From a file (in VSCode)
Next up, let’s run an entire python file to tell us hello. Inside our directory, create a new file called hello_world.py. Note that .py extension - this signifies that the content inside will be python code. Inside this file, let’s have two lines of code:
hello_world.py
print("Hello World!")
print("Otters are the best animal.")
To run this code, first save the file, and then simply click the play button (triangle in the top right!). Note that this will display an output in a terminal at the bottom of VSCode. VSCode takes the python file you told it to run, and will run every line of code individually. Thus, we get two lines of output for the two print statements.
But wait, there’s more! In VSCode we can run individual lines of code within a file as well. Simply move your cursor to the line you wish to run, and hit Shift+Enter.
Note the difference here. Instead of running the entire file, VSCode actually opened up a python window inside our terminal, and ran the single line of code, just like we did before.
Challenge 1
Challenge 2
From JupyterLab
JupyterLab is an application with a web-based user interface that enables one to work with documents and activities such as Jupyter notebooks, text editors, terminals, and even custom components in a flexible, integrated, and extensible manner.
To start JupyterLab, you can use Anaconda Navigator, a GUI that comes packaged with Anaconda if you wish. However it is nearly always easier to access it from the command line. Inside VSCode, navigate to a new terminal.
TipConda Reminder!
Make sure that you double check that this new terminal is opened with the ds-env!
From the terminal, to launch a new JupyterLab session, simply type:
terminal
> jupyter labThis should open up a screen that looks something like this:
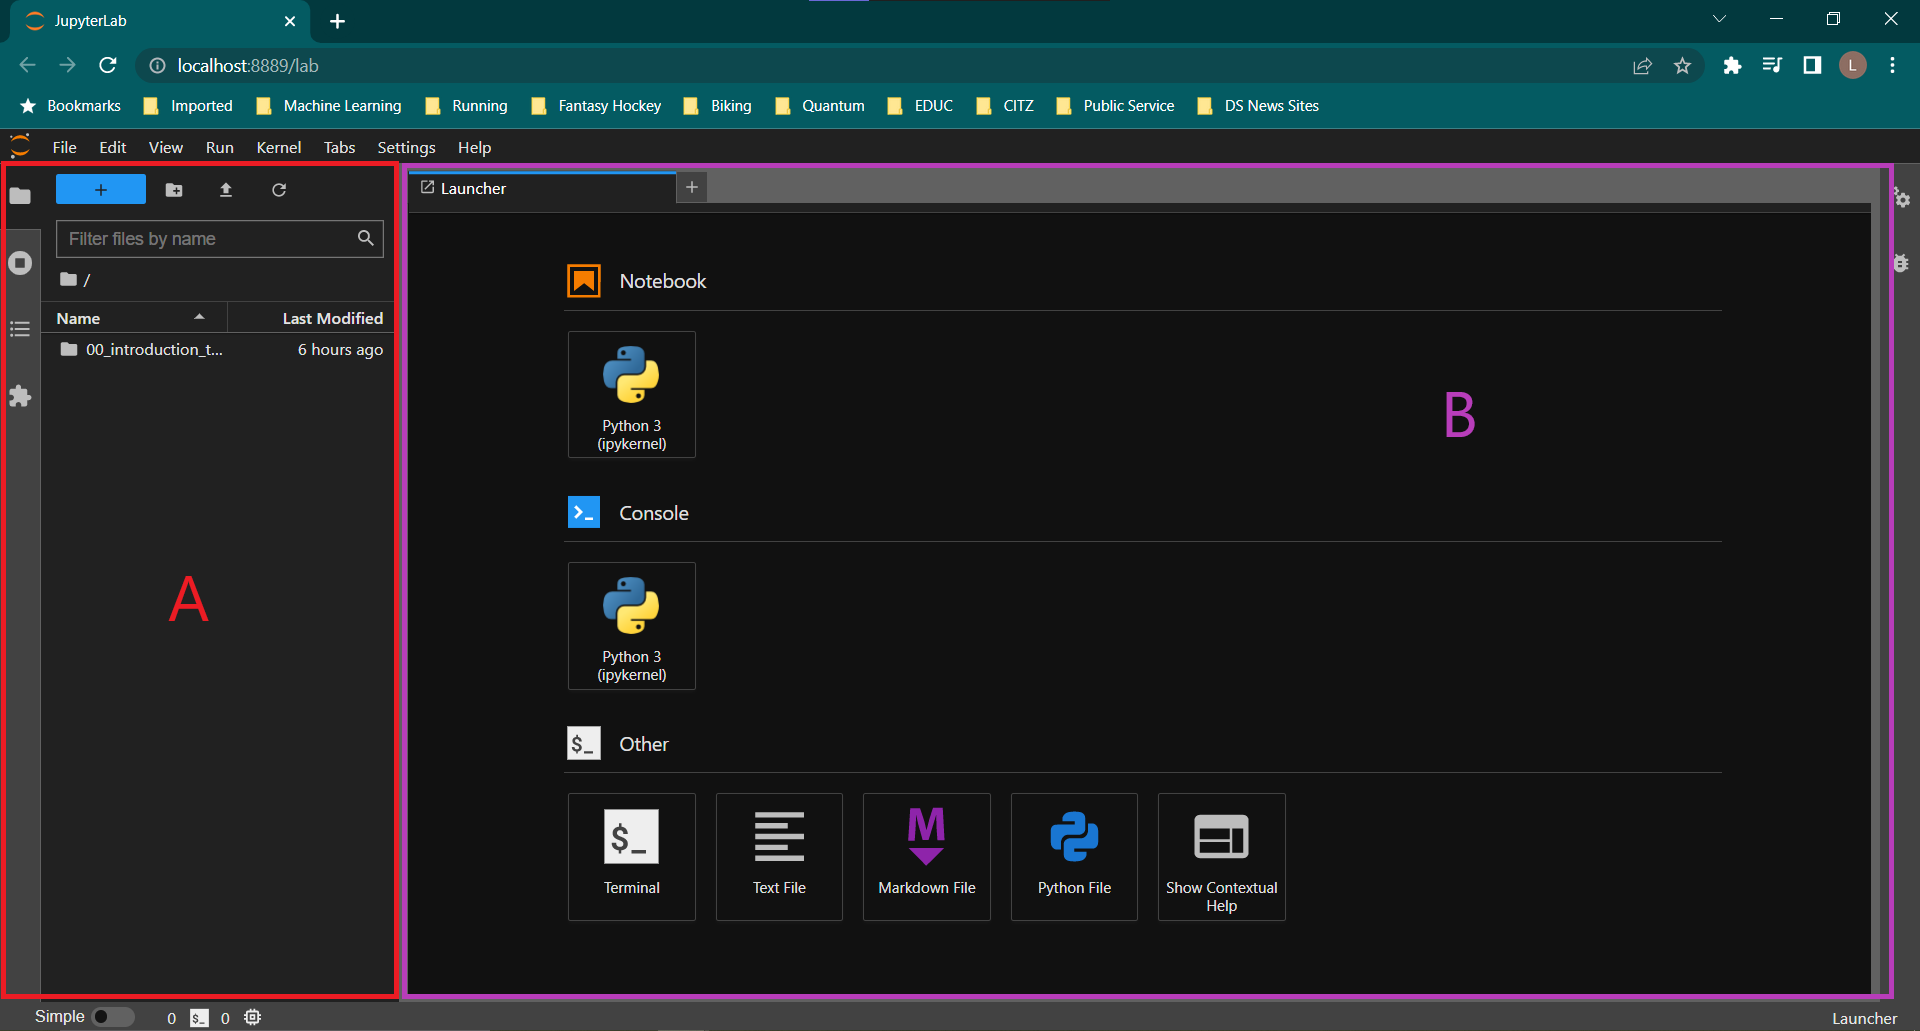
JupyterLab
TipFun Fact
You might have noticed by this point that the author of this section prefers dark mode. So if any of your programs are popping up in a different/lighter colour scheme, that’s okay!
We will be using the JupyterLab interface quite a bit, so let’s get used to the key pieces. Similar to VSCode, we have a few key areas to utilize:
On the left (area A), we have the sidebar that contains commonly used tabs. These include the file directory system (which defaults to the folder from which the session was launched), a list of open files, running kernels and terminals, a table of contents for any markdown that is written, and possibly a set of extensions.
On the right (area B), we have the main work area, where we can open new notebooks, terminals, files, etc. Here, when we have multiple open tabs, we can drag them around the main area to produce smaller panels displaying multiple pieces of work.
Generally speaking, we will be using Jupyter Notebooks, which have a .ipynb file extension. Like python files, these notebooks can run python code. However, they also support markdown (text that can be added to support source code with explanations) as well as inline viewing of data tables, plots and more. This allows us to mix source code, text and images all in one file that we can quickly use for anything such as:
- Answering ‘how did I get this number in that report?’
- Looking at the number.
- Updating the number with an updated dataset.
- Plotting the number with other numbers, and then looking at all of those numbers.
Let’s open up a notebook (click the Python 3 icon underneath the Notebook heading). This will open up a new tab called Untitled.ipynb.
Challenge 3
In this new file, we have a single blue box (this is a single cell). We can type multiple lines of code inside a single cell. Within the blue box, pressing Enter will let you add a new line to the cell. To execute a cell, we press Shift+Enter. This will execute every line of code within that cell. If there is output to display, it will display in the space directly below the cell. Pressing the + at the top of the tab will add a new cell (as will running the bottom-most cell). The ‘active’ cell will always be the one that is highlighted with a blue box.
Challenge 4
When we are done with a JupyterLab session, we must shutdown the server. From the Menu Bar select the File menu and then choose Shut Down at the bottom of the dropdown menu. You will be prompted to confirm that you wish to shutdown the JupyterLab server (don’t forget to save your work!). Click Shut Down to shutdown the JupyterLab server.
TipJupyterLab and Us!
We will be using JupyterLab for the vast majority of our work throughout this course because of the ease of use in writing and executing code all in one place. Make sure you are comfortable with:
- opening JupyterLab to a specific folder
- creating and renaming notebooks
- adding python code to multiple cells within a notebook
- executing entire code blocks
If you are unsure about any of these pieces, please ask for help!