SMTP
By default when no SMTP is specified, NotifyBC uses fake SMTP service Ethereal. Ethereal is only good for evaluation purpose as emails sent from NotifyBC are delivered to Ethereal rather than actual recipients. You can access the emails from Ethereal. NotifyBC automatically generates the Ethereal account first time and stores the account information in configuration under name etherealAccount accessible from NotifyBC web console.
For production however, setting up SMTP is mandatory. To do so, add following smtp config to src/config.local.js
module.exports = {
  //...
  email: {
    smtp: {
      host: '<your smtp host FQDN>',
      port: 25,
      pool: true,
      tls: {
        rejectUnauthorized: false,
      },
    },
  },
};
Check out Nodemailer for other config options that you can define. Fine-tuning some options are critical for performance. See benchmark advices.
Throttle
NotifyBC can throttle email requests if SMTP server imposes rate limit. To enable throttle and set rate limit, create following config in file src/config.local.js
module.exports = {
  email: {
    throttle: {
      enabled: true,
      max: 4,
      duration: 1000,
    },
  },
};
where
- enabled - whether to enable throttle or not. Default to false.
- max - max numbers of requests per duration. Default to 4.
- duration - time span in ms. Default to 1000.
Above config throttles email to 4/sec.
Inbound SMTP Server
NotifyBC implemented an inbound SMTP server to handle
In order for the emails from internet to reach the SMTP server, a host where one of the following servers should be listening on port 25 open to internet
- NotifyBC, if it can be installed on such internet-facing host directly; otherwise,
- a tcp proxy server, such as nginx with stream proxy module that can proxy tcp port 25 traffic to backend NotifyBC instances.
Regardless which above option is chosen, you need to config NotifyBC inbound SMTP server by adding following static config email.inboundSmtpServer to file src/config.local.js
module.exports = {
  email: {
    inboundSmtpServer: {
      enabled: true,
      domain: 'host.foo.com',
      listeningSmtpPort: 25,
      options: {
        // ...
      },
    },
  },
};
where
- enabled enables/disables the inbound SMTP server with default to true.
- domain is the internet-facing host domain. It has no default so must be set.
- listeningSmtpPort should be set to 25 if option 1 above is chosen. For options 2, listeningSmtpPort can be set to any opening port. On Unix, NotifyBC has to be run under root account to bind to port 25. If missing, NotifyBC will randomly select an available port upon launch which is usually undesirable so it should be set.
- optional options object defines the behavior of Nodemailer SMTP Server.
Inbound SMTP Server on OpenShift
OpenShift deployment template deploys an inbound SMTP server. Due to the limitation that OpenShift can only expose port 80 and 443 to external, to use the SMTP server, you have to setup a TCP proxy server (i.e. option 2). The inbound SMTP server is exposed as ${INBOUND_SMTP_DOMAIN}:443 , where ${INBOUND_SMTP_DOMAIN} is a template parameter which in absence, a default domain will be created. Configure your TCP proxy server to route traffic to ${INBOUND_SMTP_DOMAIN}:443 over TLS.
TCP Proxy Server
If NotifyBC is not able to bind to port 25 that opens to internet, perhaps due to firewall restriction, you can setup a TCP Proxy Server such as Nginx with ngx_stream_proxy_module. For example, the following nginx config will proxy SMTP traffic from port 25 to a NotifyBC inbound SMTP server running on OpenShift
stream {
    server {
        listen 25;
        proxy_pass ${INBOUND_SMTP_DOMAIN}:443;
        proxy_ssl on;
        proxy_ssl_verify off;
        proxy_ssl_server_name on;
        proxy_connect_timeout 10s;
    }
}
Replace ${INBOUND_SMTP_DOMAIN} with the inbound SMTP server route domain.
Bounce
Bounces, or Non-Delivery Reports (NDRs), are system-generated emails informing sender of failed delivery. NotifyBC can be configured to receive bounces, record bounces, and automatically unsubscribe all subscriptions of a recipient if the number of recorded hard bounces against the recipient exceeds threshold. A deemed successful notification delivery deletes the bounce record.
Although NotifyBC records all bounce emails, not all of them should count towards unsubscription threshold, but rather only the hard bounces - those which indicate permanent unrecoverable errors such as destination address no longer exists. In principle this can be distinguished using smtp response code. In practice, however, there are some challenges to make the distinction
- the smtp response code is not fully standardized and may vary by recipient's smtp server so it's unreliable
- there is no standard smtp header in bounce email to contain smtp response code. Often the response code is embedded in bounce email body.
- the bounce email template varies by sender's smtp server
To mitigate, NotifyBC defines several customizable string pattern filters in terms of regular expression. Only bounce emails matched the filters count towards unsubscription threshold. It's a matter of trial-and-error to get the correct filter suitable to your smtp server.
to improve hard bounce recognition
Send non-existing emails to several external email systems. Inspect the bounce messages for common string patterns. After gone live, review bounce records in web console from time to time to identify new bounce types and decide whether the bounce types qualify as hard bounce. To avoid false positives resulting in premature unsubscription, it is advisable to start with a high unsubscription threshold.
Bounce handling involves four actions
- during notification dispatching, envelop address is set to a VERP in the form bn-{subscriptionId}-{unsubscriptionCode}@{inboundSmtpServerDomain} routed to NotifyBC inbound smtp server.
- when a notification finished dispatching, the dispatching start and end time is recorded to all bounce records matching affects recipient addresses
- when inbound smtp server receives a bounce message, it updates the bounce record by saving the message and incrementing the hard bounce count when the message matches the filter criteria. The filter criteria are regular expressions matched against bounce email subject and body, as well as regular expression to extract recipient's email address from bounce email body. It also unsubscribes the user from all subscriptions when the hard bounce count exceeds a predefined threshold.
- A cron job runs periodically to delete bounce records if the latest notification is deemed delivered successfully.
To setup bounce handling
set up inbound smtp server
verify config email.bounce.enabled is set to true or absent in src/config.local.js
verify and adjust unsubscription threshold and bounce filter criteria if needed. Following is the default config in file src/config.ts compatible with rfc 3464
module.exports = {
  email: {
    bounce: {
      enabled: true,
      unsubThreshold: 5,
      subjectRegex: '',
      smtpStatusCodeRegex: '5\\.\\d{1,3}\\.\\d{1,3}',
      failedRecipientRegex:
        '(?:[a-z0-9!#$%&\'*+/=?^_`{|}~-]+(?:\\.[a-z0-9!#$%&\'*+/=?^_`{|}~-]+)*|"(?:[\\x01-\\x08\\x0b\\x0c\\x0e-\\x1f\\x21\\x23-\\x5b\\x5d-\\x7f]|\\\\[\\x01-\\x09\\x0b\\x0c\\x0e-\\x7f])*")@(?:(?:[a-z0-9](?:[a-z0-9-]*[a-z0-9])?\\.)+[a-z0-9](?:[a-z0-9-]*[a-z0-9])?|\\[(?:(?:(2(5[0-5]|[0-4][0-9])|1[0-9][0-9]|[1-9]?[0-9]))\\.){3}(?:(2(5[0-5]|[0-4][0-9])|1[0-9][0-9]|[1-9]?[0-9])|[a-z0-9-]*[a-z0-9]:(?:[\\x01-\\x08\\x0b\\x0c\\x0e-\\x1f\\x21-\\x5a\\x53-\\x7f]|\\\\[\\x01-\\x09\\x0b\\x0c\\x0e-\\x7f])+)\\])',
    },
  },
};
where
unsubThreshold is the threshold of hard bounce count above which the user is unsubscribed from all subscriptions
subjectRegex is the regular expression that bounce message subject must match in order to count towards the threshold. If subjectRegex is set to empty string or undefined, then this filter is disabled.
smtpStatusCodeRegex is the regular expression that smtp status code embedded in the message body must match in order to count towards the threshold. The default value matches all rfc3463 class 5 status codes. For a multi-part bounce message, the body limits to the one of the following parts by content type in descending order
- message/delivery-status
- html
- plain text
failedRecipientRegex is the regular expression used to extract recipient's email address from bounce message body. This extracted recipient's email address is compared against the subscription record as a means of validation. If failedRecipientRegex is set to empty string or undefined, then this validation method is skipped. The default RegEx is taken from a stackoverflow answer. For a multi-part bounce message, the body limits to the one of the following parts by content type in descending order
- message/delivery-status
- html
- plain text
Change config of cron job Delete Notification Bounces if needed
List-unsubscribe by Email
Some email clients provide a consistent UI to unsubscribe if an unsubscription email address is supplied. For example, newer iOS built-in email app will display following banner
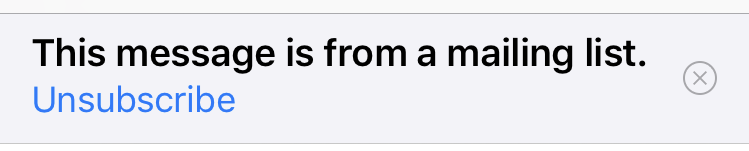
To support this unsubscription method, NotifyBC implements a custom inbound SMTP server to transform received emails sent to address un-{subscriptionId}-{unsubscriptionCode}@{inboundSmtpServerDomain} to NotifyBC unsubscribing API calls. This unsubscription email address is generated by NotifyBC and set in header List-Unsubscribe of all notification emails.
To enable list-unsubscribe by email
- set up inbound smtp server
- verify config email.listUnsubscribeByEmail.enabled is set to true or absent in src/config.local.js
To disable list-unsubscribe by email, set email.listUnsubscribeByEmail.enabled to false in src/config.local.js
module.exports = {
  email: {
    listUnsubscribeByEmail: { enabled: false },
  },
};