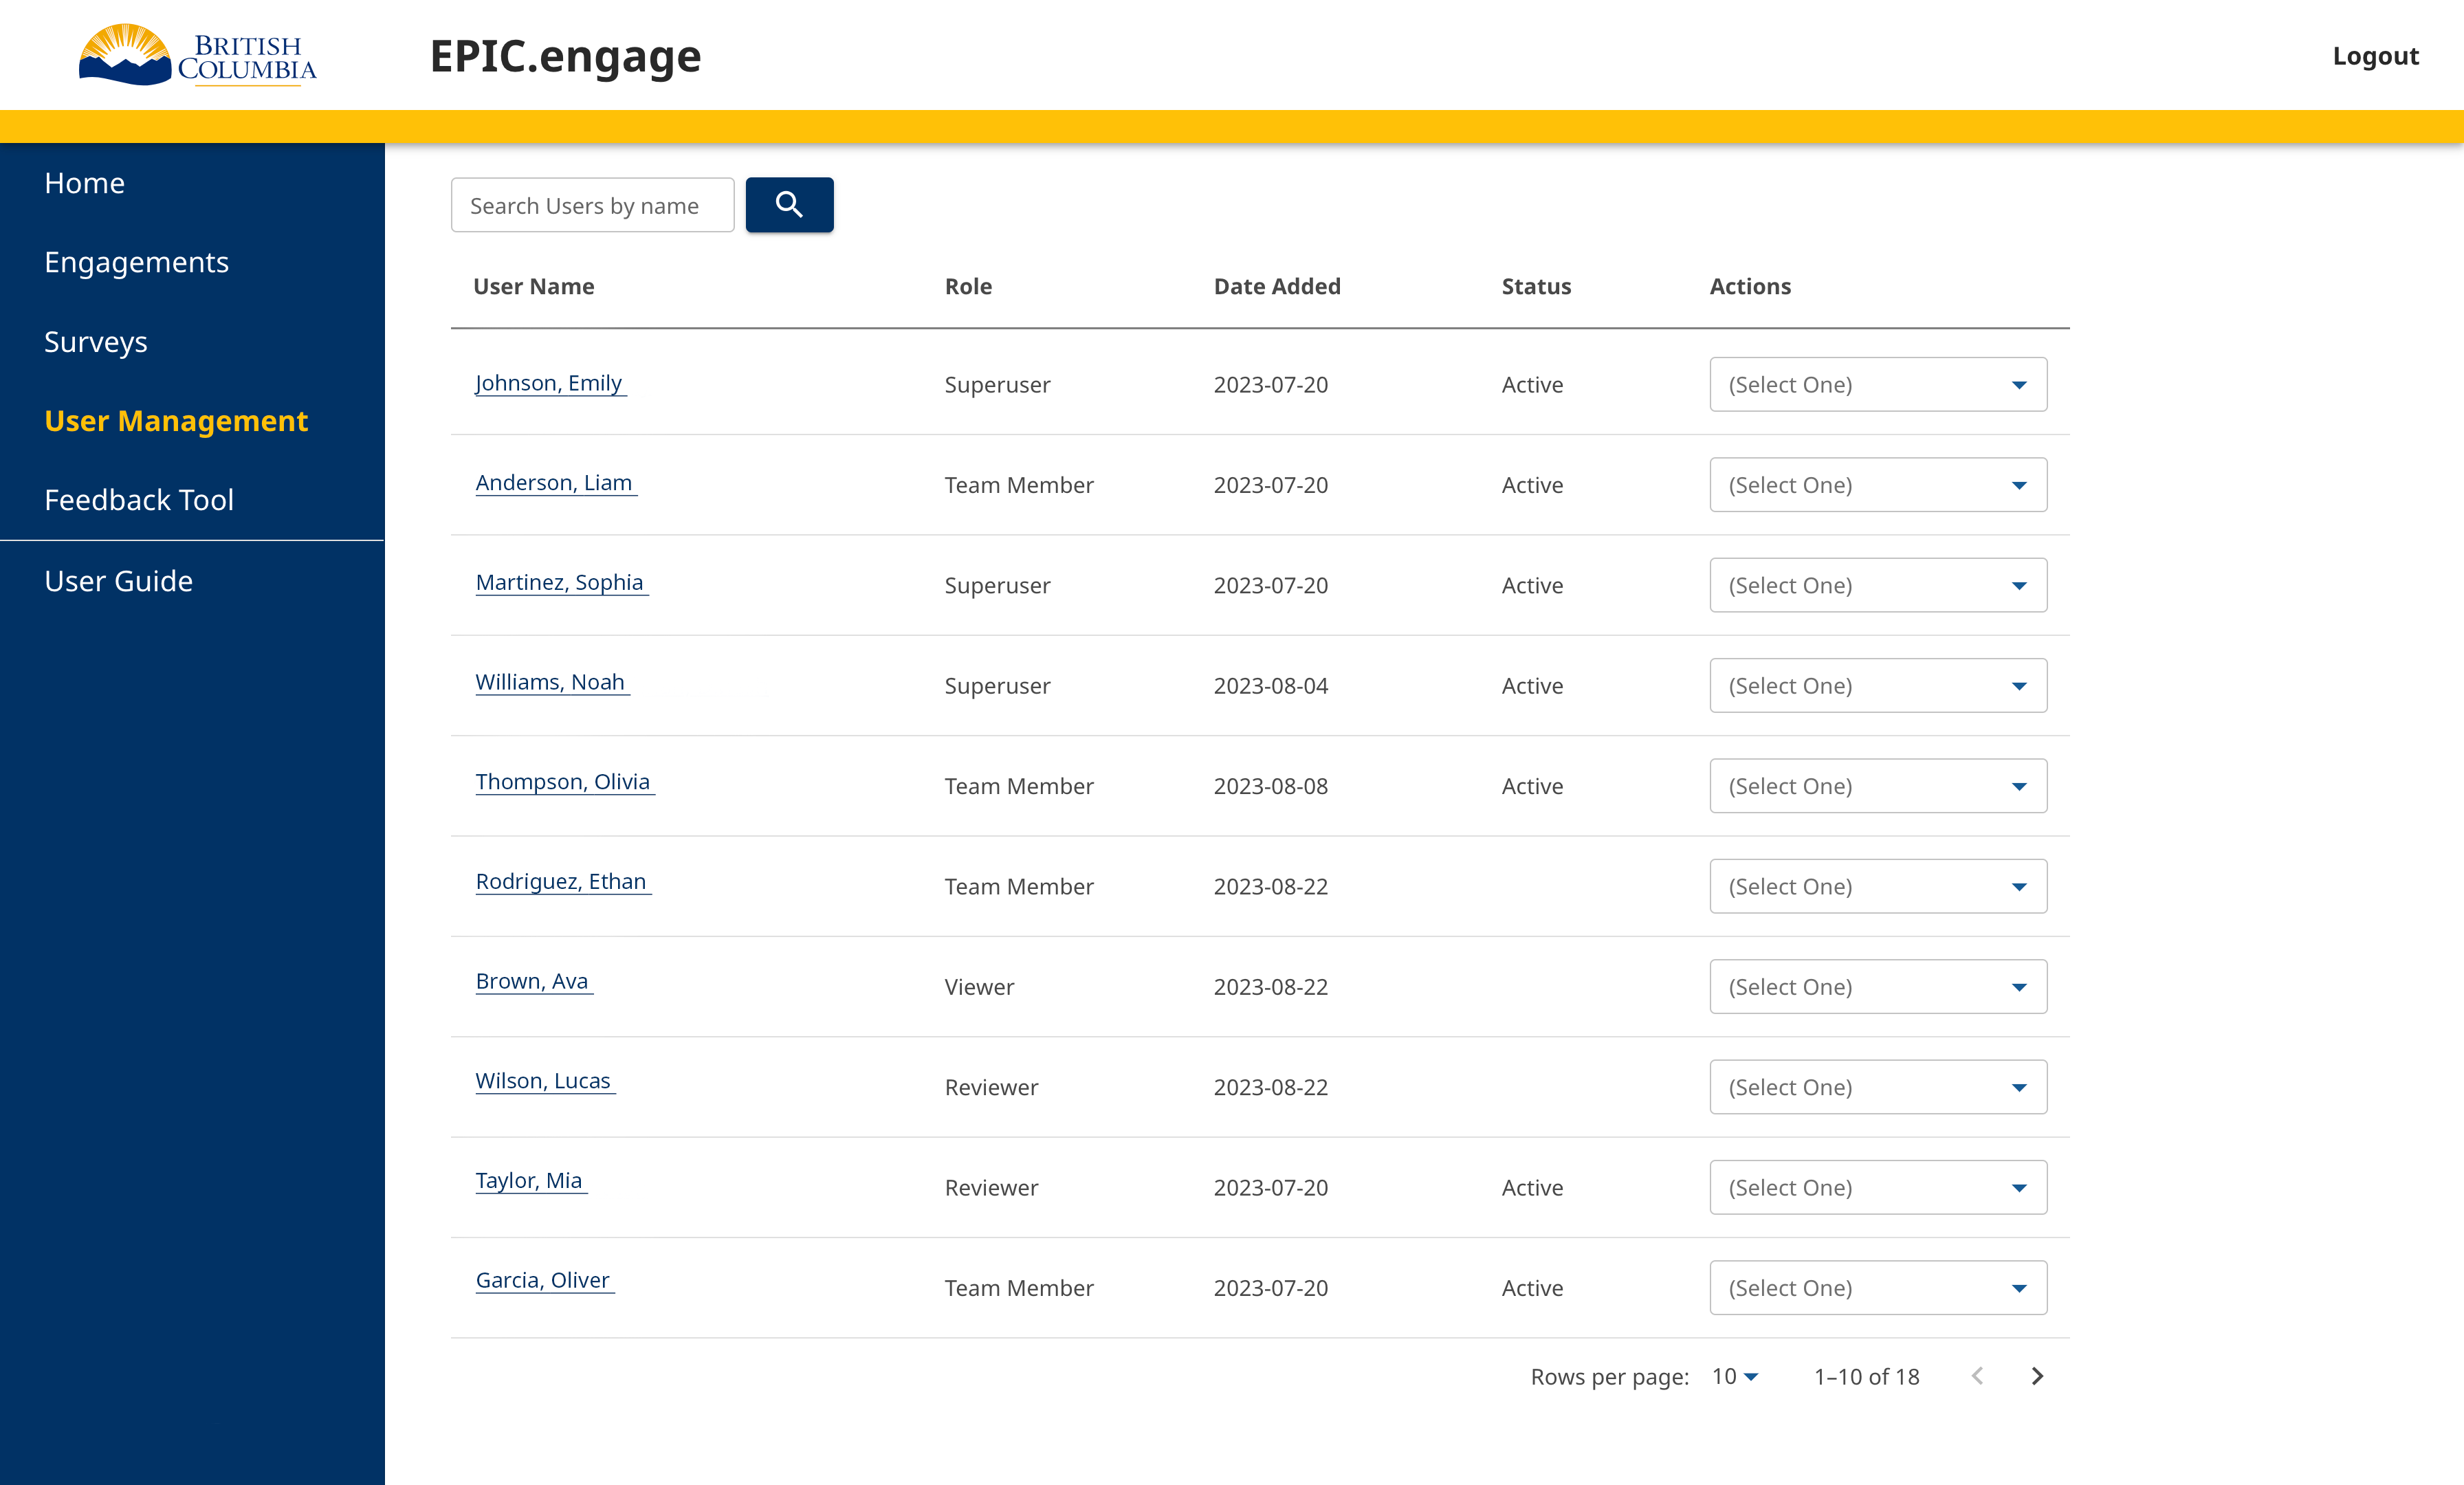
After clicking User Management on the left side navigation, you will see the user listing page.
There are various roles within the application that have different access and authentication levels. The User Management panel allows existing users to see a full list of users, their roles, the date they were added and their status. At the top of the page, you can search for specific users by name.
This page is where users can assign roles to other people within the application through the action drop-down.
Each user and their properties are grouped together by row.
The first column is the User Name. Clicking the name will open the User Details page for that particular user. For more information on the User Details page, go to the User Details page.
The second column is the Role of the user. Users can be assigned as Administrator, Team Member, Reviewer, or Viewer. If no role has been assigned, this column will be blank.
The third column is the Date that the user was added to the application.
The fourth column is the Status of the user. Users can either be Active or Deactivated.
The fifth column has an action drop-down. There are three options that are conditionally displayed, depending on your role and the user’s role.
- Assign a Role: This will be the only option in the action drop-down if a user does not have a current role. Only Administrators can assign a role.
- Reassign a Role: Users can be reassigned to a different role from the action drop-down. Only Administrators can reassign a role.
- Add to an Engagement: Users can be added to engagements from the action drop-down. Administrators can add any user to any engagement. Team Members assigned to (an) engagement(s) can add other Team Members to those specific engagements. Reviewers and viewers can’t assign roles.
